Download OpenCV-2.3.0-win-superpack.exe from http://sourceforge.net/projects/opencvlibrary/files/opencv-win/2.3/
Run OpenCV-2.3.0-win-superpack.exe and copy the generated folder OpenCV2.3 to C drive
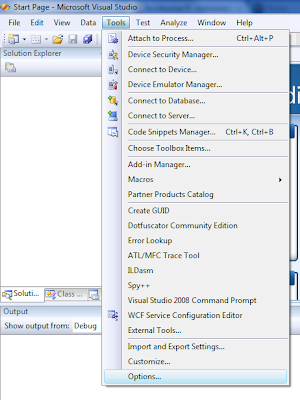
Open Microsoft Visual Studio 2008 and click Tools->Options
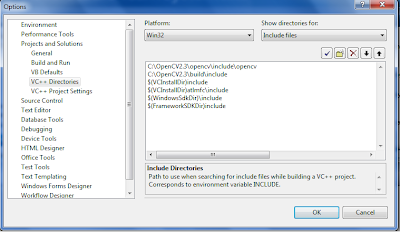
Select Projects and Solutions and then VC++ Directories. Select Include files in Show directories for: drop down menu. Add the following paths.
C:\OpenCV2.3\opencv\include\opencv
C:\OpenCV2.3\build\include
Select Library files in Show directories for: drop down menu. Add the following path.
C:\OpenCV2.3\build\x86\vc9\lib
Now we have added include and library file paths and this need to be done only for the first time.
Create an new project in Visual Studio 2008
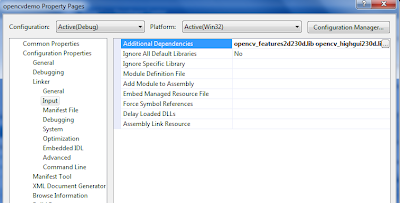
Click Project->Properties. Select Configuration Properties -> Linker -> Input. Make sure you select Debug in 'Configuration:' drop down menu and then add the following to the Additional Dependencies.
opencv_features2d230d.lib opencv_highgui230d.lib opencv_core230d.lib opencv_imgproc230d.lib opencv_ml230d.lib opencv_objdetect230d.lib opencv_video230d.lib opencv_contrib230d.lib opencv_calib3d230d.lib
Now select Release in 'Configuration:' drop down menu and then add the following to the Additional Dependencies and click OK
opencv_features2d230.lib opencv_highgui230.lib opencv_core230.lib opencv_imgproc230.lib opencv_ml230.lib opencv_objdetect230.lib opencv_video230.lib opencv_contrib230.lib opencv_calib3d230.lib

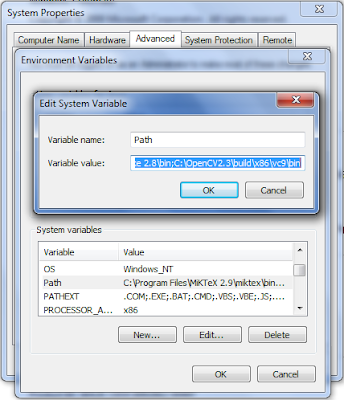
Add C:\OpenCV2.3\build\x86\vc9\bin to the environment path as shown in screenshot below. You may need to restart the system after setting this.
To test whether the OpenCV is working, add a C++ file under Source files as shown in screen shots below.
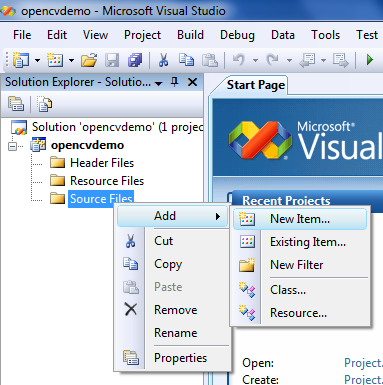
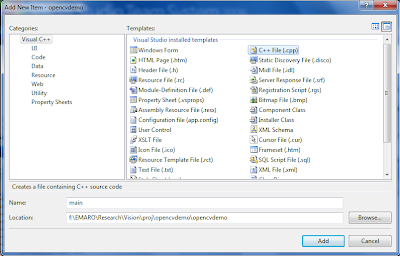
Copy the sample program given below and build it and run. An image will be displayed in a window.
No comments:
Post a Comment